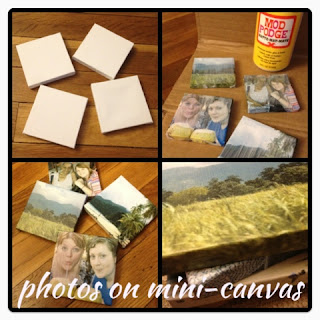
While wandering the aisles at Michaels today I found a 4-pack of 3" square canvas, stretched onto tiny wood frames and already primed! They were $4.99 but with the 40% coupon it was a total steal. Btw if you don't have the apps for both Michaels and Hobby Lobby, stop everything you're doing and download them. Back to the DIY!
Materials needed:
Canvas
ModPodge
Foam brush
Photos
I printed my photos on a color laserjet, at 4" square. This will give you enough room to wrap your photos around the sides of the canvas. You could also paint the edges if you don't want to wrap them. Remember, if you're going to wrap the edges, be sure you center your images with that in mind.
Cover your canvas with ModPodge and center your photo on top. Wait a few minutes for it to dry, and then wrap and ModPodge your edges. Fold the corners down just like you are wrapping a present. When that dries, ModPodge the top and sides. I did mine with two coats of the matte, but I bet glossy would look great too!
They dry pretty quickly. I absolutely love them, and wish I had bought a few more packages of the canvas!
I will definitely be doing this project again!
I decided to hang mine with a ribbon (just staple the ribbon along the back and make a loop at the top. Easy peasy! :)


7 comments:
OOOOO .... Great idea! I'll be trying it!
:D
Did you use regular paper or photo paper? Thanks! (saw this pinned, by the way!)
Hi Myla! Thanks for the comment! You use regular printer paper, the photo paper would be too thick and you wouldn't get the nice canvas texture bleeding through. :)
Super cute!!! I think I'll give it a try.
Your work is splendid! It looks like the pictures are printed on an Epson photo paper. Kudos to your DIY project!
It’s wonderful, Heather! Well, I really enjoy transferring photos to canvass these days. You’ll see a lot of it in my house. :D What I love about having a photo canvas is that it can stay around for years to come. I mean for as long as you’re willing to keep it, you can have it for the rest of your life. ;)
The pictures looks really wonderful. I always like DIY work. Thanks for sharing.
Post a Comment